Wwise Events in Unreal Engine 5 (Post Event) - Game Audio Basics
Si prefieres leer una versión en Español, da click en este botón =>
Unreal Engine Version: 5.0.3
Wwise Version: 2021.1.10.7883
This blog post will guide you on how to play “post” a Wwise Event in Unreal Engine 5 using Blueprints and C++ code. We will create a simple one-shot type event and a looping music type event. Additionally, I will give you a simple algorithmic design to handle the triggering behavior of these events.
We will trigger our actions for these tests by pressing the E, R, and T keys. Finally, I will show you how to bind these keys to our functions in Blueprints and C++.
We will create all the blueprint examples inside the BP_ThirdPersonCharacter class and define the C++ ones in the MyUE5ProjectCharacter.cpp file. For this tutorial, we will learn how to implement these events using both C++ and Blueprints, so make sure to open both classes.
IMPORTANT!
〰️
IMPORTANT! 〰️
Prerequisites:
Create an empty C++ third-person project called “MyUE5Project”.
Download and integrate the Wwise plugin into your project through the Wwise Launcher.
Activate Event-Based Packaging
For this tutorial to make sense, you need to know how to integrate the Wwise plugin into Unreal Engine. Additionally, consider reading and referencing my previous post about UPROPERTY & UFUNCTION:
IMPORTANT!
〰️
IMPORTANT! 〰️
Wwise Setup:
One-Shot Event:
Open your Wwise project. Make sure you are on the Designer Layout by going to Layouts > Designer or pressing the F5 key on your keyboard. Right-click on the Default Work Unit under the Actor-Mixer Hierarchy and create a Sound SFX. Drag and drop your audio file on top of your sound effect. You can name your sound as you like. Optionally, you can set a color to it to help with organization.

Right-click on your new sound effect and select New Event > Play. Name your event “Play_OneShot”

Music Loop Event:
Switch to the Interactive Music Layout by going to Layouts > Interactive Music or pressing the F10 key on your keyboard. Right-click the Default Work Unit under the Interactive Music Hierarchy and create a Music Playlist Container. Then, right-click on the playlist and create a Music Segment. Drag and drop your music audio file on top of your music segment. You can name the playlist and the music segment as you like. Optionally, you can set a color for them to help with organization.
Your music hierarchy should look similar to this:

Click on your Music Playlist Container and drag your Music Segment inside the Music Playlist Editor. Set the loop count to Infinite so the music segment loops indefinitely. Don't forget to set the tempo!

Right-click on your new music playlist and select New Event > Play. Name your event “Play_MusicLoop”
If you prefer, feel free to download and use these sounds below.
Save your Wwise project. Go back to your Unreal project and go to Build > Generate Sound Data > Build. You should be able to see and test your new events in the Content Drawer inside MyUEProject/Content/WwiseAudio/Events/Default Work Unit.

C++ Setup:
Let’s implement our events inside the main Player Pawn to simplify our testing. You can find the C++ parent class in MyUE5Project/MyUE5ProjectCharacter and the child Blueprint Class in MyUE5Project/Content/ThirdPerson/Blueprints/BP_ThirdPersonCharacter.
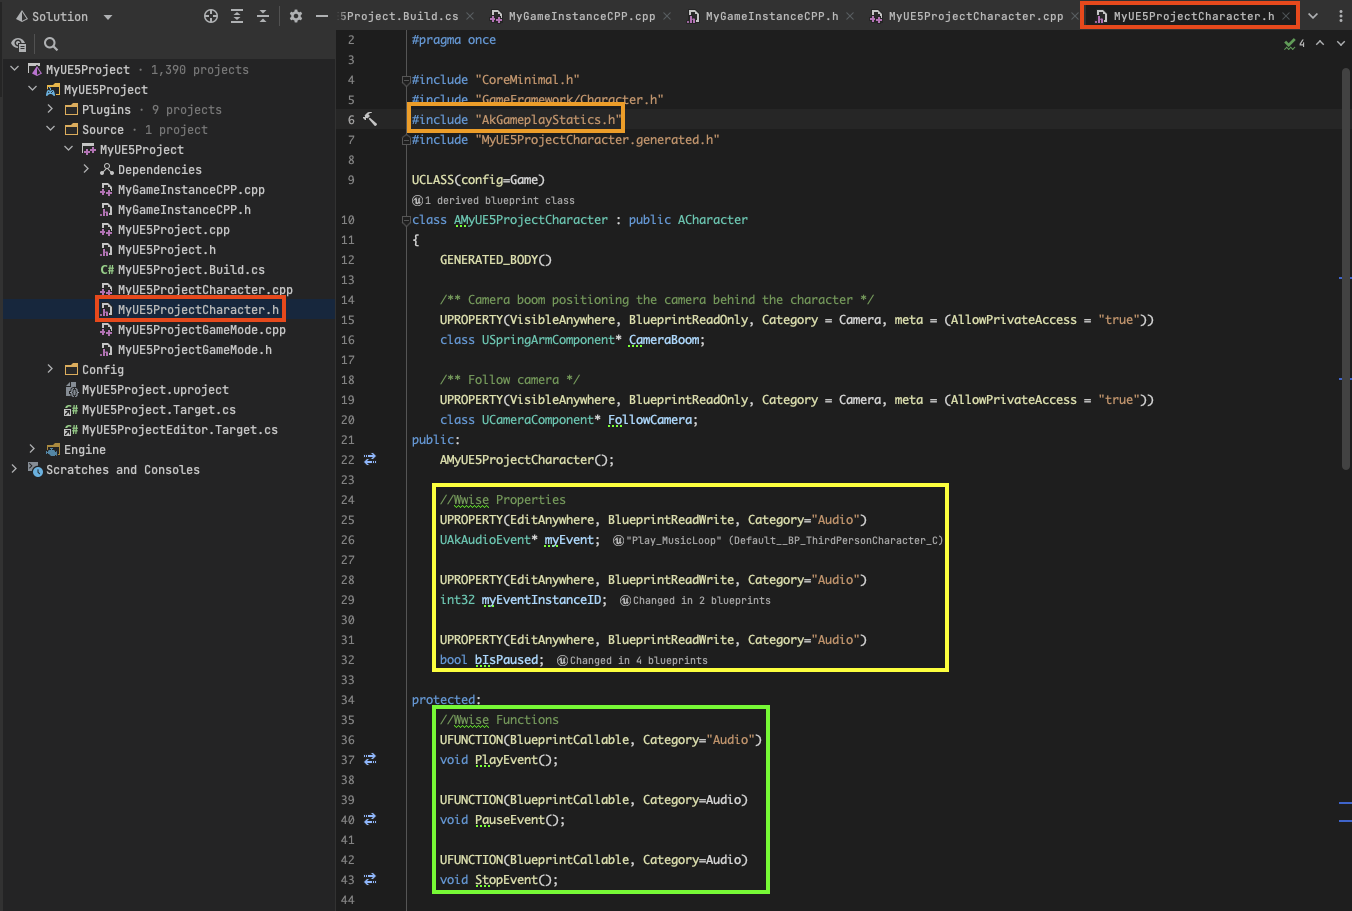
Add this directive to access the Wwise API:
.h file:
#include "AkGameplayStatics.h"
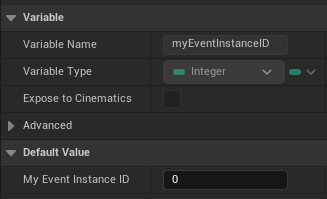
Declare a Wwise event, an integer, and a boolean property
.h file:
UPROPERTY(EditAnywhere, BlueprintReadWrite, Category="Audio")
UAkAudioEvent* myEvent;

UPROPERTY(EditAnywhere, BlueprintReadWrite, Category="Audio")
int32 myEventInstanceID;

UPROPERTY(EditAnywhere, BlueprintReadWrite, Category="Audio")
bool bIsPaused;
Declare three functions, PlayEvent(), PauseEvent(), and StopEvent():
.h file:
UFUNCTION(BlueprintCallable, Category="Audio")
void PlayEvent();

UFUNCTION(BlueprintCallable, Category="Audio")
void PauseEvent();

UFUNCTION(BlueprintCallable, Category="Audio")
void StopEvent();
.h file:
Save your code and compile it in the editor.


You should be able to see these properties in the blueprint graph of your BP_ThirdPersonCharacter class:


One-Shot Sounds:
These types of sounds don't require much control. They tend to be short in length, and many can exist simultaneously. In most cases, triggering them is enough to achieve the desired behavior. In Wwise, we can limit how many instances can exist simultaneously.
IMPORTANT:
Assign the “Play_OneShot" event to My Event property
Blueprint:

Right Click on the graph and search for: “Keyboard Event E“, “Post Event”, “Get My Event”, and “Get a Reference to Self".
.cpp file:
void AMyUE5ProjectCharacter::PlayEvent()
{
    UAkGameplayStatics::PostEvent(myEvent, this, 0, FOnAkPostEventCallback());
}
Parameters/Arguments:
AKEvent (UAkAudioEvent*) = myEvent
The Wwise audio event to be played
Actor (AActor*) = this
The actor in the world where this event is attached. Use this as a default.
CallbackMask (int32 or enum AKCallbackType) = 0
This argument will define the callback type if this event triggers a callback function. Use 0 for None.
PostEventCallback (FOnAkPostEventCallback) = FOnAkPostEventCallback()
If this event triggers a callback function, this argument will output the delegate that triggers the callback function. Use the constructor FOnAkPostEventCallback() for None.
.cpp file:

Looping Sounds:
In most cases, we don't want multiple instances playing simultaneously for looping sounds. Music and ambiances are clear examples of these types of sounds. To achieve this, we need to create a simple system that checks if an instance of an event exists or not and if it’s in a paused state. Using an int32 property to store the instance ID and a bool property to check if it is paused, plus some flow control techniques, we will create an algorithm that checks if an Instance exists. Therefore, we can Pause/Unpause, Stop and Start the event again. Only one instance of this event will play at a time.
IMPORTANT:
Assign the “Play_MusicLoop" event to My Event property.
Play Event:
Blueprint:

Right-click on the graph and search for: “Keyboard Event E“, "Get My Event Instance ID“, “Equal", “Branch“, “Get My Event", “Get A Reference To Self”, “Post Event", “Execute Action On Playing ID”, “Set My Event Instance”, and “Set Is Paused”.
.cpp file:
void AMyUE5ProjectCharacter::PlayEvent()
{
   if (!myEventInstanceID)
   {
	myEventInstanceID = UAkGameplayStatics::PostEvent(myEvent,
	    this, 0, FOnAkPostEventCallback());

	bIsPaused = false;
   }
   else
   {
	UAkGameplayStatics::ExecuteActionOnPlayingID(AkActionOnEventType::Resume,
	     myEventInstanceID, 0, EAkCurveInterpolation::Linear);

	bIsPaused = false;
   }
}
Parameters/Arguments:
AKEvent (UAkAudioEvent*) = myEvent
The Wwise audio event to be played
Actor (AActor*) = this
The actor in the world where this event is attached. Use this as a default.
CallbackMask (int32 or enum AKCallbackType) = 0
This argument will define the callback type if this event triggers a callback function. Use 0 for None.
PostEventCallback (FOnAkPostEventCallback) = FOnAkPostEventCallback()
If this event triggers a callback function, this argument will output the delegate that triggers the callback function. Use the constructor FOnAkPostEventCallback() for None.
bIsPaused (bool) = false
Boolean property to track the paused state of our event.
ActionType (enum) = AkActionOnEventType::Resume;
Sets the type of action applied to this event.
Event Instance ID (int32) = myEventInstanceID;
The instance number of this event.
Transition Duration (int32) = 0;
Transition duration in milliseconds to apply this action. Use 0 as the default
Fade Curve (enum) = EAkCurveInterpolation::Linear;
The type of interpolation curve to use for this transition. If left blank, Linear will be set as the default.
Pause Event:
Blueprint:

Right-click on the graph and search for: “Keyboard Event R“, “Get Is Paused”, ”Get My Event Instance ID”, “Execute Action On Playing ID”, and “Set Is Paused”
.cpp file:
void AMyUE5ProjectCharacter::PauseEvent()
{
   if (!bIsPaused)
   {
	UAkGameplayStatics::ExecuteActionOnPlayingID(AkActionOnEventType::Pause,
	myEventInstanceID, 0, EAkCurveInterpolation::Linear);

	bIsPaused = true;
   }
}
Parameters/Arguments:
ActionType (enum) = AkActionOnEventType::Pause;
Sets the type of action applied to this event.
Event Instance ID (int32) = myEventInstanceID;
The instance number of this event.
Transition Duration (int32) = 0;
Transition duration in milliseconds to apply this action. Use 0 as the default
Fade Curve (enum) = EAkCurveInterpolation::Linear;
The type of interpolation curve to use for this transition. If left blank, Linear will be set as the default.
bIsPaused (bool) = true
Boolean property to track the paused state of our event.
Stop Event:
Blueprint:

Right-click on the graph and search for: “Keyboard Event T“, ”Get My Event Instance ID”, “ Execute Action On Playing ID", “Set My Event Instance ID“, and “Set Is Paused”
.cpp file:
void AMyUE5ProjectCharacter::StopEvent()
{
   UAkGameplayStatics::ExecuteActionOnPlayingID(AkActionOnEventType::Stop,
	myEventInstanceID, 0, EAkCurveInterpolation::Linear);

   myEventInstanceID = 0;
   bIsPaused = false;
}
Parameters/Arguments:
ActionType (enum) = AkActionOnEventType::Stop;
Sets the type of action applied to this event.
Event Instance ID (int32) = myEventInstanceID;
The instance number of this event.
Transition Duration (int32) = 0;
Transition duration in milliseconds to apply this action. Use 0 as the default
Fade Curve (enum) = EAkCurveInterpolation::Linear;
The type of interpolation curve to use for this transition. If left blank, Linear will be set as the default.
bIsPaused (bool) = false
Boolean property to track the paused state of our event.
.cpp file:

Complete Blueprint Graph:

Extra - All in C++?:
If you prefer staying entirely in C++, I will show you how to create a direct reference to the Wwise Event assets and Bind your keyboard keys to trigger your functions.
Direct reference to an asset:
Go to the Content Drawer and find the event or asset you want to reference, right-click on it and select Copy Reference to get your event’s path.

Open your .h file and paste your event’s path to your Wwise event property inside the TEXT(“ “) argument:
.h file:
UPROPERTY(VisibleAnywhere, BlueprintReadOnly, Category="Audio")
UAkAudioEvent* myEvent = LoadObject<UAkAudioEvent>(nullptr, TEXT("AkAudioEvent'/Game/WwiseAudio/Events/Default_Work_Unit/Play_OneShot.Play_OneShot'"));
Key Bindings to Your Functions:
Inside the .cpp file, find the SetupPlayerInputController() function and add your bindings inside. These lines of code achieve the same as calling “Keyboard Events” in Blueprints by binding the keys E, R, and T to your PlayEvent(), PauseEvent(), and StopEvent() functions.
.cpp file:
void AMyUE5ProjectCharacter::SetupPlayerInputComponent(class UInputComponent* PlayerInputComponent)
{
  PlayerInputComponent->BindKey("E", IE_Pressed, this, &AMyUE5ProjectCharacter::PlayEvent);
  PlayerInputComponent->BindKey("R", IE_Pressed, this, &AMyUE5ProjectCharacter::PauseEvent);
  PlayerInputComponent->BindKey("T", IE_Pressed, this, &AMyUE5ProjectCharacter::StopEvent);
}