UPROPERTY & UFUNCTION in Unreal Engine 5 (For Game Audio)
Si prefieres leer una versión en Español, da click en este botón =>
Unreal Engine Version: 5.0.2
Have you wondered how to collaborate with programmers in your team without being a programmer yourself? How to use and extend C++ capabilities with Unreal Engine's visual scripting (Blueprints)?
The answer is UProperty and UFunction macros.
These powerful functions will allow us, artists and designers, to use our programmer's solid architecture, exposing their functions and properties to our Blueprint classes. We can even start thinking about triggering our audio events from native C++ ourselves!
This tutorial will show you the most common and useful ways of using UProperties and UFunctions for game audio.
We will create an empty third-person project called "MyUE5Project" and a Sound Wave asset within it.
We will also create a new C++ Actor Class where we will create and test our Properties and Functions.
You must have an IDE installed beforehand (Visual Studio for Windows or Xcode for Mac). I use Rider as my preferred IDE, so the look of my interface might be different than yours.
Official Documentation:
More Resources:
First Steps:
1. Create your UE5 project
Open the Epic Games Launcher and create a new C++ - Third Person Project:
Your project will be created and then compiled….
On the UE5 editor, go to Tools > Open Visual Studio or Tools > Open Xcode.
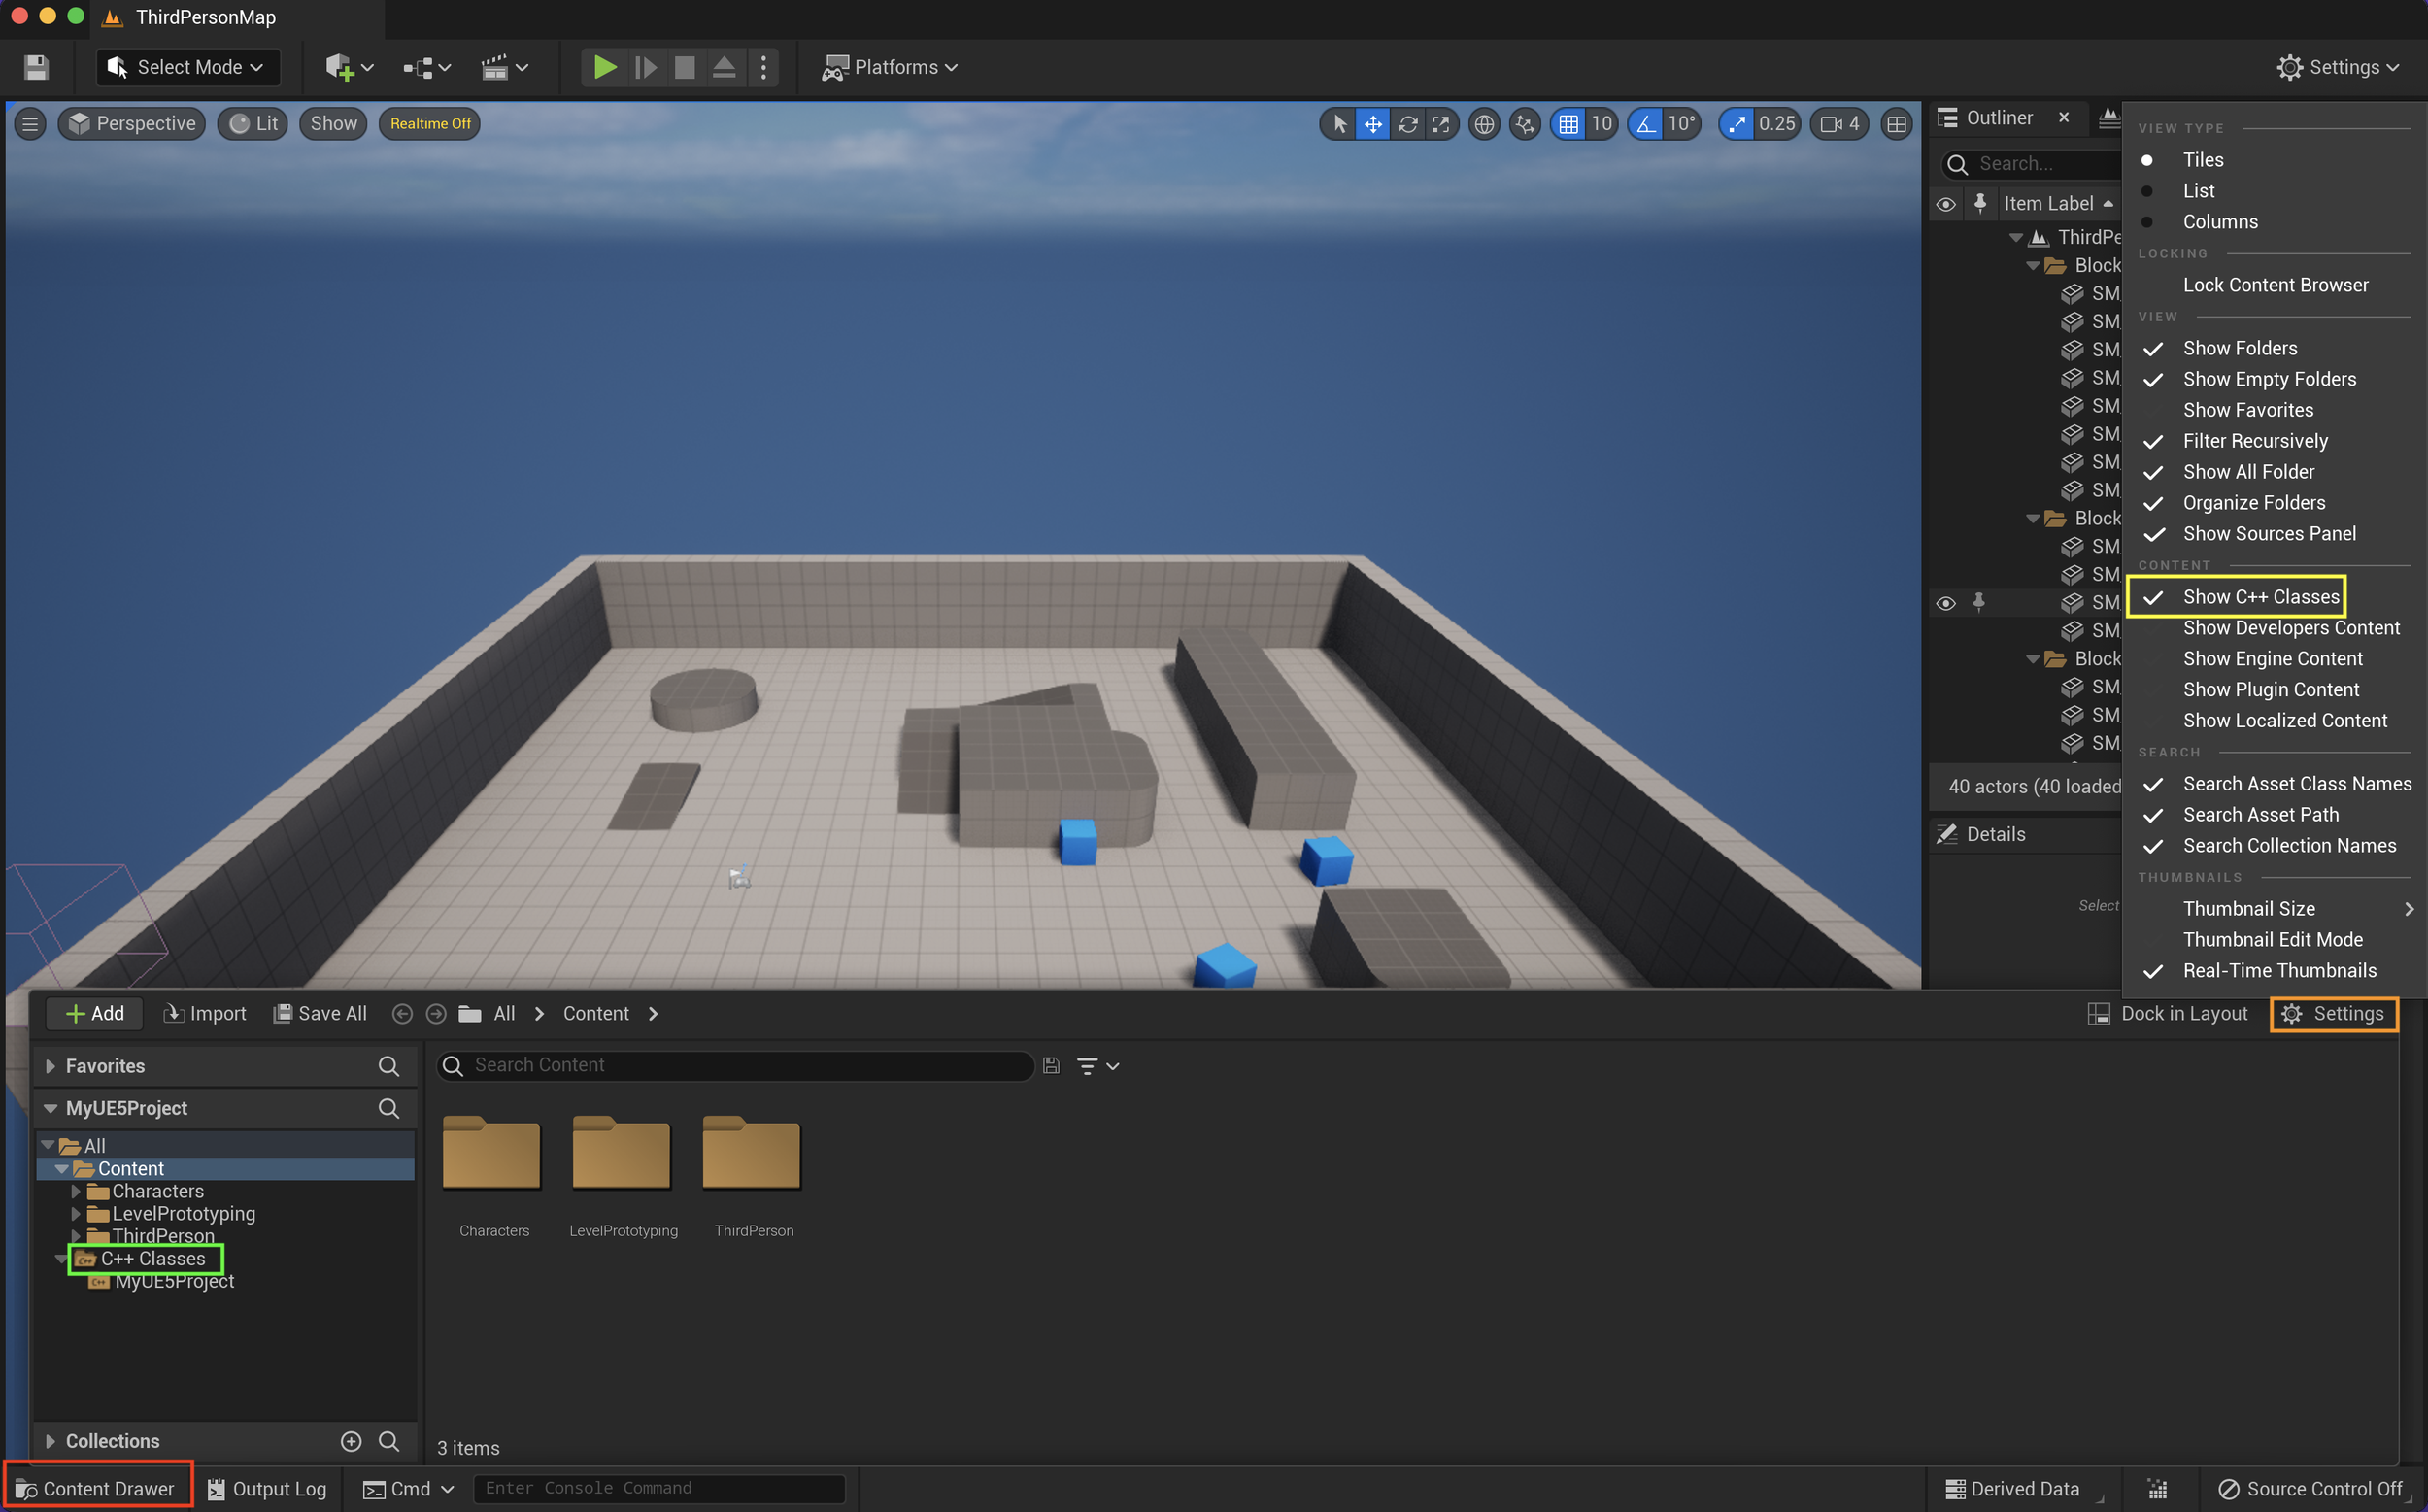
Open the Content Drawer and click on Settings, then select Show C++ Classes.
The C++ Classes folder will be exposed.
In the Content Drawer, go to the "MyUE5Project" folder. Right-click and select "New C++ Class".
Create an Actor type class and name it "MyCPPActorClass."
Inside your IDE go to Games/MyUEProject/Source/MyUEProject and open both “MyCPPActorClass.cpp” and "MyCPPActorClass.h”.
About .h and .cpp files: Every time you create a class in Unreal Engine, you end up with two files. The .h file or "header" will hold your "Declarations" (Properties/Variables, Constants, and Functions), and the .cpp file will have the "Implementations" or "Definitions" of these declarations.
2. USoundWave Property
Inside "MyCPPActorClass.h," create a new property of class "USoundWave" and name it "testSound."
USoundWave* testSound;
Save your modified code. Go back to your UE project and compile.
Drag "MyCPPActorClass” inside your map on the outliner.
Before we continue, right-click to create a Blueprint Class based on “MyCPPActorClass” called “MyBPActorClass”. Drag it inside your map on the outliner too.
UPROPERTY:
We will use the same “testSound” for every example, so you need to save and compile your changes on each case to test these out. Additionally, we will add Category=”Audio” as a specifier, so it’s easier to find it inside the editors. You can use any name you want for the category.
1. Visible Anywhere | Edit Anywhere
Visible Anywhere: Visible in the main and blueprint editor | Not editable | Exposed to Parent Classes and Objects (Instances).
.h file:
UPROPERTY(VisibleAnywhere, Category="Audio")
USoundWave* testSound;
Edit Anywhere: Visible in the main editor and in the blueprint editor | Editable | Exposed to Parent Classes and Objects (Instances).
.h file:
UPROPERTY(EditAnywhere, Category="Audio")
USoundWave* testSound;
Click on the images to expand:
2. Visible Defaults Only | Edit Defaults Only
Visible Defaults Only: Visible in the main and blueprint editor | Not editable | Exposed to Parent Classes exclusively.
.h file:
UPROPERTY(VisibleDefaultsOnly, Category="Audio")
USoundWave* testSound;
Edit Defaults Only: Visible in the main and blueprint editor | Editable | Exposed to Parent Classes exclusively.
.h file:
UPROPERTY(EditDefaultsOnly, Category="Audio")
USoundWave* testSound;
Click on the images to expand:
3. Visible Instance Only | Edit Instance Only
Visible Instance Only: Visible in the main and blueprint editor | Not editable | Exposed to Objects (Instances) exclusively.
.h file:
UPROPERTY(VisibleInstanceOnly, Category="Audio")
USoundWave* testSound;
Edit Instance Only: Visible in the main and blueprint editor | Editable | Exposed to Objects (Instances) exclusively.
.h file:
UPROPERTY(EditInstanceOnly, Category="Audio")
USoundWave* testSound;
Click on the images to expand:
7. Blueprint Read Only
Exposed to Blueprint Classes | Non-editable | Get property: Yes - Set property: No
UPROPERTY(BlueprintReadOnly, Category="Audio")
USoundWave* testSound;
Click on the images to expand:
8. Blueprint Read Write
Exposed to Blueprint Classes | Editable | Get property: Yes - Set property: Yes
UPROPERTY(BlueprintReadWrite, Category="Audio")
USoundWave* testSound;
Click on the images to expand:
You can combine Visible/Edit with Blueprint read, and Category as specifiers in the UPROPERTY macro.
Example:
UPROPERTY(VisibleDefaultsOnly, BlueprintReadWrite, Category="My Category")
USoundWave* testSound;
UFUNCTION:
Now, let's create a function called "PlayTestSound()" that will trigger a sound with a USoundWave property and, in some cases, will return this text: "PlayTestSound() function triggered." We will use the same function and modify it for every example, so you must save and compile your changes on each case to test these out. Additionally, we will add Category=" Audio" as a specifier, so it's easier to find it inside the editors. You can use any name you want for the category.
Important information about this function:
UGameplayStatics::PlaySound2D(this, testSound);
this: This USoundWave will be placed to the Object where this script is attached.
testSound: Is the USoundWave sound asset that this function will play.
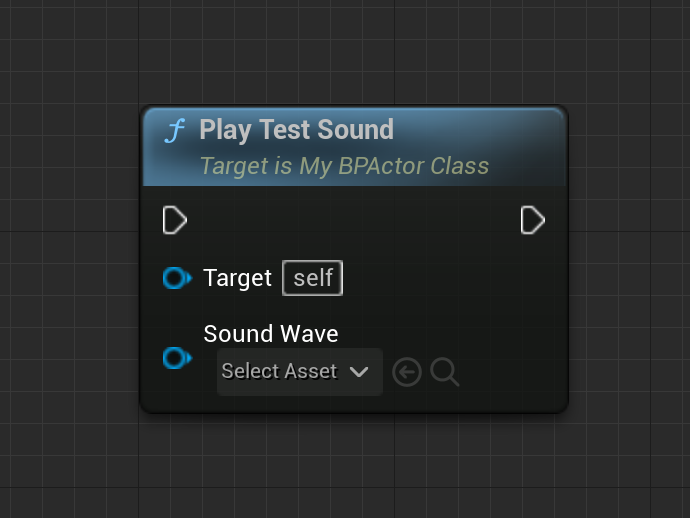
1. Blueprint Callable
Can be inserted in a blueprint graph after an Event function | Can be void, accept a property input and return a property too. You can have a combined void function with a property input and a combined return type function with a property input too.
Example #1 (Void):
.h file:
UFUNCTION(BlueprintCallable, Category="Audio")
void PlayTestSound();
.cpp file:
void AMyCPPActorClass::PlayTestSound()
{
  UGameplayStatics::PlaySound2D(this, testSound);
}
Example #2 (Property Input):
.h file:
UFUNCTION(BlueprintCallable, Category="Audio")
void PlayTestSound(USoundWave* soundWave);
.cpp file:
void AMyCPPActorClass::PlayTestSound(USoundWave* soundWave)
{
  UGameplayStatics::PlaySound2D(this, soundWave);
}
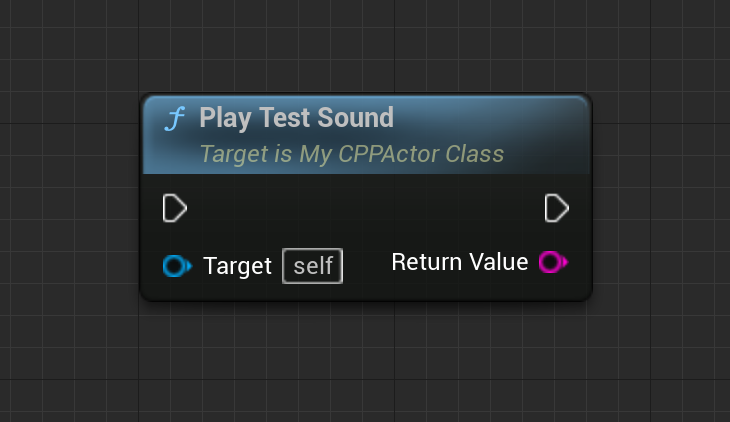
Example #3 (Return Property):
.h file:
UFUNCTION(BlueprintCallable, Category="Audio")
FString PlayTestSound();
.cpp file:
FString AMyCPPActorClass::PlayTestSound()
{
  UGameplayStatics::PlaySound2D(this, testSound);
  return "PlayTestSound() function triggered";
}
2. Blueprint Pure
Can be inserted in a blueprint graph without an Execution pin | Must return a property and can have a property input.
Example #1 (Return Property):
.h file:
UFUNCTION(BlueprintPure, Category="Audio")
FString PlayTestSound();
.cpp file:
FString AMyCPPActorClass::PlayTestSound()
{
  UGameplayStatics::PlaySound2D(this, testSound);
  return "PlayTestSound() function triggered";
}
Example #2 (Return Property + Property Input):
.h file:
UFUNCTION(BlueprintPure, Category="Audio")
FString PlayTestSound(USoundWave* soundWave);
.cpp file:
FString AMyCPPActorClass::PlayTestSound(USoundWave* soundWave)
{
  UGameplayStatics::PlaySound2D(this, soundWave);
  return "PlayTestSound() function triggered";
}
3. Blueprint Implementable Event
It can be inserted and implemented in a blueprint graph, so it doesn’t need implementation in the .cpp file| It Can be void, accept a property input, and return a property too. You can have a combined void function with a property input and a combined return type function with a property input too.
Example #1 (Void):
.h file:
UFUNCTION(BlueprintImplementableEvent, Category="Audio")
void PlayTestSound();
Example #2 (Property Input):
.h file:
UFUNCTION(BlueprintImplementableEvent, Category="Audio")
void PlayTestSound(USoundWave* soundWave);
Example #3 (Return Property):
To add this event type to the graph, you must go to Functions > Override > Play Test Sound. This will open a new graph where you can do the implementation.
.h file:
UFUNCTION(BlueprintImplementableEvent, Category="Audio")
FString PlayTestSound();
Example #4 (Return Property + Property Input):
To add this event type to the graph, you must go to Functions > Override > Play Test Sound. This will open a new graph where you can do the implementation.
.h file:
UFUNCTION(BlueprintImplementableEvent, Category="Audio")
FString PlayTestSound(USoundWave* soundWave);
4. Blueprint Native Event
It can be inserted in a blueprint graph without an execution pin. This event can be implemented in C++ and extended in Blueprints or overridden completely by Blueprints | It Can be void, accept a property input and return a property too. You can have a combined void function with a property input and a combined return type function with a property input too.
It is essential to create a unique definition on the .cpp file, which contains all the desired functionality. You can bring this implementation to your blueprint graph by right-clicking your function’s node and selecting “Add call to parent function,” now, you can extend this function in Blueprints or leave it empty and discard the native C++ implementation.
Example:
void [MyClass]::[MyFunction]_Implementation()
{
  //My function's body
}
Example #1 (Void):
.h
UFUNCTION(BlueprintNativeEvent, Category="Audio")
void PlayTestSound();
.cpp
void AMyCPPActorClass::PlayTestSound_Implementation()
{
  UGameplayStatics::PlaySound2D(this, testSound);
}
Example #2 (Property Input):
.h
UFUNCTION(BlueprintNativeEvent, Category="Audio")
void PlayTestSound(USoundWave* soundWave);
.cpp
void AMyCPPActorClass::PlayTestSound_Implementation(USoundWave* soundWave)
{
  UGameplayStatics::PlaySound2D(this, soundWave);
}
Example #3 (Return Property):
To add this event type to the graph, you must go to Functions > Override > Play Test Sound. This will open a new graph where you can do the implementation.
.h
UFUNCTION(BlueprintNativeEvent, Category="Audio")
FString PlayTestSound();
.cpp
FString AMyCPPActorClass::PlayTestSound_Implementation()
{
  UGameplayStatics::PlaySound2D(this, testSound);
  return "PlayTestSound() function triggered";
}
5. Test out your functions
In the editor, click on the Content Drawer and then on Import to add a .Wav sound file. Alternatively, you can drag and drop a file directly into the editor.
IMPORTANT: Currently UE5 just supports 16 bit audio files. If you prefer, you can use this audio file:
To do a simple test, let’s call our “PlayTestSound()” function inside “BeginPlay(),” or insert a node on your Blueprint graph after the Begin Play Event node. Save, compile, and go back to the main editor and click on the Play button. You should be able to hear your sound now!
Blueprint:
C++:
void AMyCPPActorClass::BeginPlay()
{
  Super::BeginPlay();
  PlayTestSound();
}


