Vertical Re-Mixing in Unreal Engine with Metasounds + Quartz (Part 1/2)
Si prefieres leer una versión en Español, da click en este botón =>
Unreal Engine Version: 5.0.3
This blog post shows how to implement a simple looping music cue using Unreal Engine's Metasounds. This music cue has four “layers” that play interactively and in sync, one on top of the other, to create a vertical re-mixing system. Finally, I show how to trigger changes or states on this metasound using a Quartz clock.
I implemented the same systems twice for this test project, one using Blueprints visual scripting and another using native C++. Here is the list of essential tools and keywords used for this project:
I programmed all the functionality inside the MusicPlayerActor C++ parent class, BP_MusicPlayerActor blueprint class, and the ThirdPersonMap level blueprint.
Important:
Please consider that this guide does not intend to teach creative sound design. Instead, it exclusively focuses on game audio's implementation and programming aspects.
Download the project here:
Part 1 - Metasound:
The Music Cue:
This project uses a 4-part (layers) music composition with these characteristics:
Tempo: 76.0 bpm
Meter: 4/4
Length: *8 bars
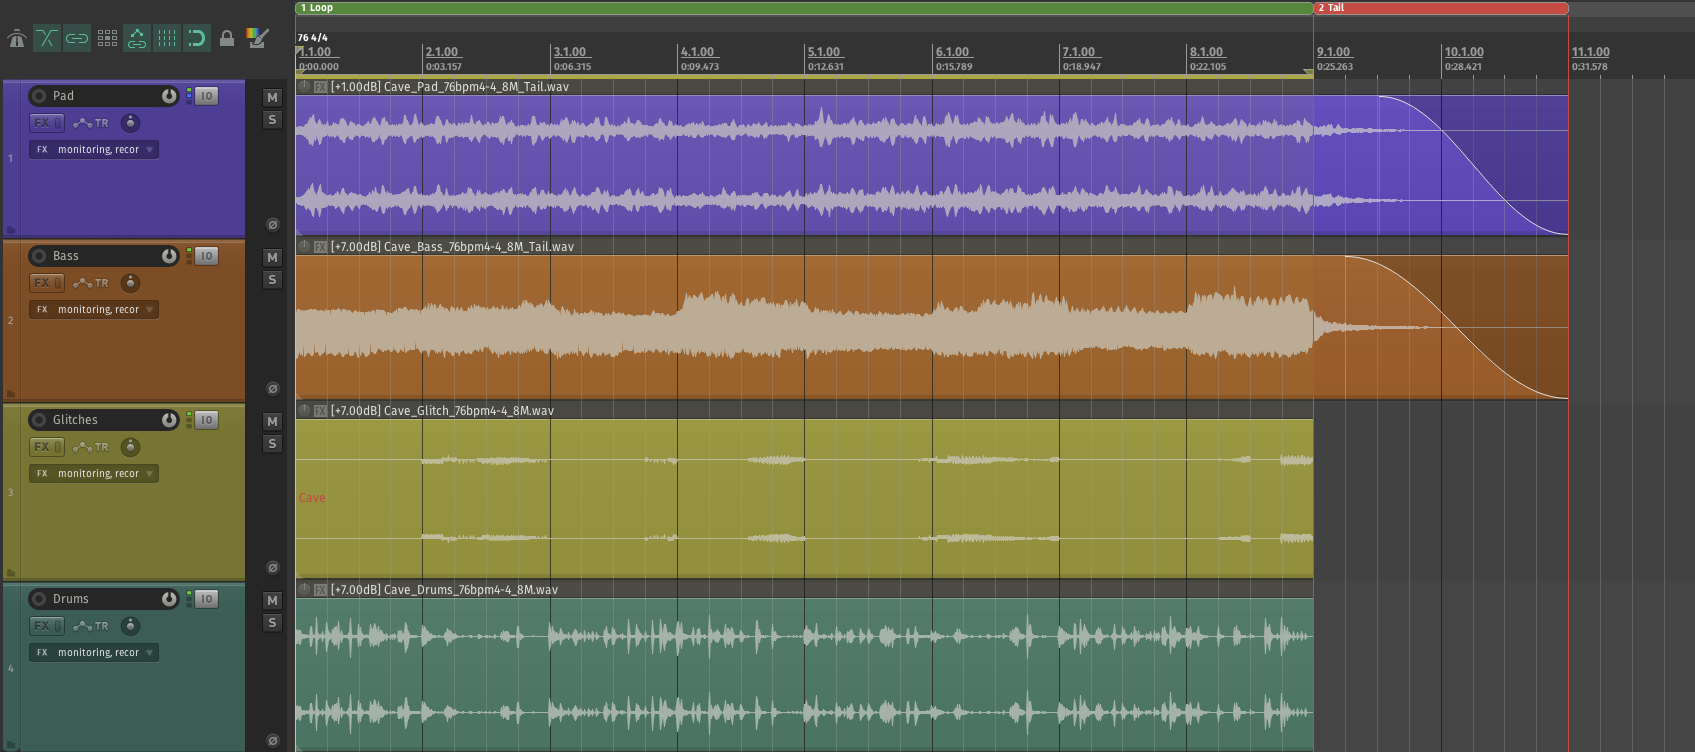
* The image below shows that the “Pad” and “Bass” stems are longer than 8 bars. These files contain a "tail” or the natural decay of its instruments. The tail of these tracks allows us to create seamless transitions between every music loop, and it is essential to export them like this.
Metasound Source:
To create Metasounds, go to the Unreal Editor and enable Metasound by going to Edit > Plugins, and enabling “Metasound”.
After re-starting the editor, Metasound Source will be available when right-clicking on the content drawer inside the “Sounds” category


For this project I created a MetaSound Source called “S_MusicCue_MS”

These are the Members of this Metasound Source:
Triggers (Orange):
EndCue: Stops the looping behavior. The Metasound will stop its timeline when the audio volume reaches 0dB
PlayBass: Plays the bass audio track in sync
PlayGlitch: Plays the glitch audio track in sync
PlayPad: Plays the pad audio track in sync
OnNearlyFinishedDrums: Prepares the next loop before the current loop ends
Wave Assets (Blue):
Bass, Drums, Glitch, Pad: These are the Wave Assets or Audio Files.
Audio Signal Flow (Pink):
Bass, DrumsAudio(L, R), GlitchAudio(L, R), PadAudio(L, R): Audio flow and connections between nodes.
Floats (Green):
DrumsPlaybackLocation: Keeps track of the relative position of the “Drums” Wave Asset
EnvelopeBass, Envelope Glitch, Envelope Pad: Interpolates an attack curve to the gain inputs on the master mixer
Time (Cyan):
LoopPosition: Keeps track of the relative position of the “Drums” Wave Asset in seconds
Layer 1: Drums

This section plays the “Drums” layer. It is triggered by OnPlay, or OnNearlyFinishedDrums every time the loop ends. If EndCue its triggered, OnNearlyFinishedDrums won’t be called so the system won’t loop again. The position of this Wave Asset is tracked so the other layers can be played in sync with it.
Layer 2: Glitch

This section plays the “Glitch” layer. It is triggered by PlayGlitch, or OnNearlyFinishedDrums only if PlayGlitch was triggered first. The Wave Player node receives the updated position of the music cue so its always in sync.
Layer 3: Bass

This section plays the “Bass” layer. It is triggered by PlayBass, or OnNearlyFinishedDrums only if PlayBass was triggered first. The Wave Player node receives the updated position of the music cue so its always in sync. This Wave Asset contains a tail which extends two extra bars after the loop ends, so it is important to have two Wave Player nodes so the previous sound overlaps with the next one, seamlessly.
Layer 4: Pad

This section plays the “Pad” layer. It is triggered by PlayPad, or OnNearlyFinishedDrums only if PlayPad was triggered first. The Wave Player node receives the updated position of the music cue so its always in sync. This Wave Asset contains a tail which extends two extra bars after the loop ends, so it is important to have two Wave Player nodes so the previous sound overlaps with the next one, seamlessly.
The Master Mixer Section

The Stereo Mixer combines all the layers and routes them into the left and right outputs. An ADSR envelope is used to create an audio fade-in for the “Glitch”, “Pad”, and the “Bass” layers. Finally, when the EndCue is engaged OnFinished is triggered when the amplitude reaches 0db.
About Part 2
On my next post I will share how to implement this Metasound into the game using both Blueprints and native C++. I'll show how to setup a Quartz Clock and how to trigger each layer synced with a musical tempo.

